Boat gelcoat sealant is a polymer-based protective coating that bonds chemically to your hull's fiberglass surface, shielding it from UV degradation, salt corrosion, and oxidation. Unlike traditional carnauba wax that sits on top of the gelcoat and wears away in 4 to 8 weeks, a quality marine sealant forms a semi-permanent hydrophobic barrier lasting 3 to 6 months. According to West Marine's Advisor guide on surface protection, modern polymer sealants provide significantly longer-lasting protection than wax alone because they create a chemical bond with the gelcoat rather than a mechanical one. Proper surface preparation — washing, decontaminating, and correcting oxidation before application — is what determines whether that sealant lasts one month or six. This guide covers every step from assessment through maintenance, so your sealant application delivers maximum durability.
What Gelcoat Sealant Does
Gelcoat sealant (also called GRP sealer or marine surface sealant) creates a protective barrier between your boat's gelcoat and the environment. Unlike wax that sits on the surface, sealant bonds chemically with the gelcoat for longer-lasting protection.
Protection Mechanisms
| Function | How It Works |
|---|---|
| UV Blocking | UV absorbers convert radiation to heat before it damages gelcoat |
| Hydrophobic Barrier | Reduced surface energy causes water to bead and run off |
| Contamination Shield | Smooth surface prevents salt, grime, and pollutants from bonding |
| Oxidation Prevention | Sealed surface blocks the air and UV needed for oxidation |
Sealant vs. Wax: Key Differences
| Factor | Sealant | Wax |
|---|---|---|
| Bond type | Chemical | Physical |
| Durability | 3-6 months | 4-8 weeks |
| UV protection | High (with proper formula) | Low to moderate |
| Removal | May require polish | Washes off over time |
| Depth of shine | Bright, reflective | Warm, deep |
Marine Sealant Types Compared
Not all sealants serve the same purpose. According to testing by Practical Sailor, sealant performance varies dramatically by chemistry. Here's how the major types compare for fiberglass boat applications:
| Sealant Type | Best For | Adhesion | Flexibility | Removable? | Cure Time | Typical Use |
|---|---|---|---|---|---|---|
| Polyurethane (e.g., 3M 5200) | Permanent below-waterline bonds | Extremely strong | Moderate | Very difficult | 24-48 hours | Through-hulls, keel joints |
| Polyurethane (e.g., 3M 4200) | Semi-permanent bonds | Strong | Good | With effort | 24-48 hours | Deck hardware, rub rails |
| Polysulfide | Below-waterline fittings | Strong | Excellent | Moderate | 24-72 hours | Portlights, hull-deck joints |
| Silicone | Temporary seals, gaskets | Low to gelcoat | Excellent | Easy | 12-24 hours | Hatches, non-structural seals |
| Polymer/Ceramic (surface sealant) | UV protection, surface coating | Chemical bond | N/A (thin film) | Polish off | 1-24 hours | Hull topsides, gelcoat protection |
Key distinction: Bedding compounds (polyurethane, polysulfide) fill joints and seal hardware in place. Surface sealants (polymer/ceramic) coat the gelcoat as a protective film. The American Boat and Yacht Council (ABYC) standards specify bedding compound requirements for through-hull fittings and deck hardware based on whether the joint needs to be permanent or serviceable. This guide focuses on surface sealants for gelcoat protection — if you need to bed hardware, choose your compound based on the table above.
Materials Needed
Essential Supplies
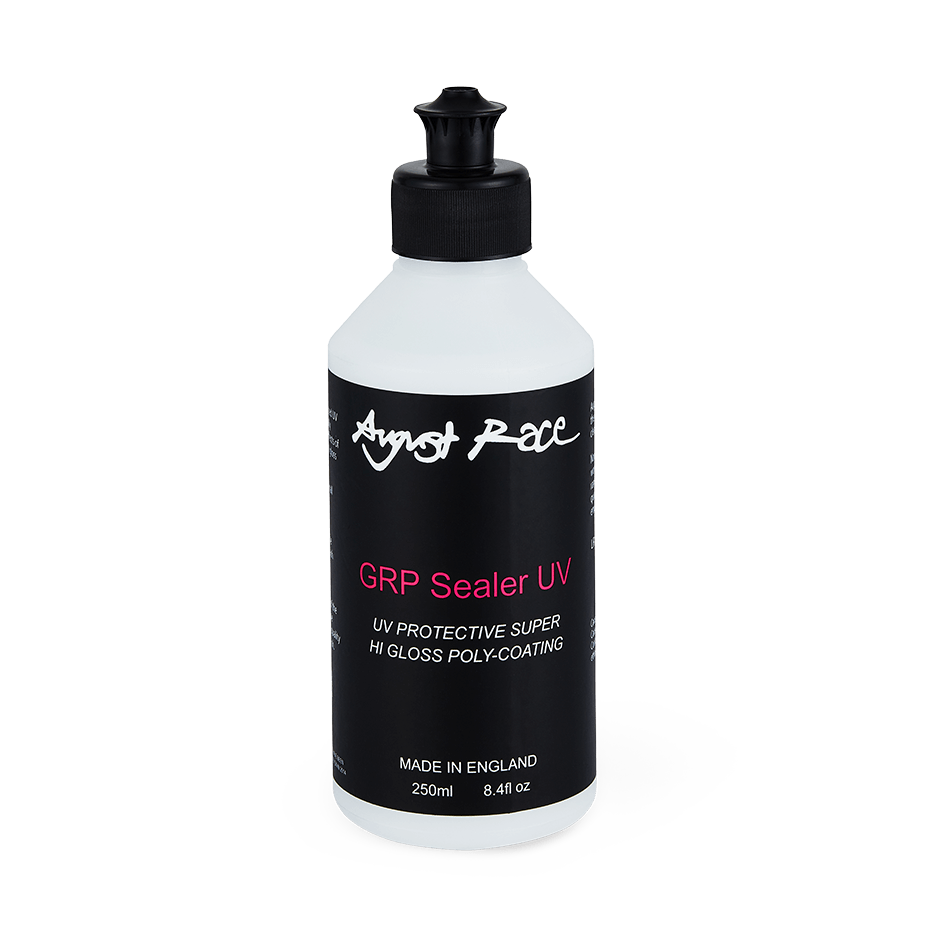
- Gelcoat sealant (GRP Sealer UV recommended)
- Marine wash soap (Boat Wash Pro)
- Foam applicator pads (multiple)
- Clean microfiber towels (at least 6)
- Spray bottle with water
- Masking tape (automotive grade)
- Bucket and wash mitt
Optional but Helpful
- Dual-action polisher with soft pad
- IPA (isopropyl alcohol) panel wipe
- Gloss meter (for before/after measurement)
- Clay bar or mitt for decontamination
Step 1: Assess Surface Condition
Before applying sealant, evaluate your gelcoat:
Surface Check
Run your hand across the gelcoat. What do you feel?
| Condition | What It Means | Action Needed |
|---|---|---|
| Smooth, glossy | Ready for sealant | Proceed to wash |
| Slightly rough | Light contamination | Clay bar before sealing |
| Rough, grabby | Heavy contamination | Decontaminate thoroughly |
| Chalky residue | Oxidation present | Compound/polish before sealing |
| Visible damage | Cracks, peeling | Professional repair first |
When to Correct Before Sealing
Sealant locks in the current condition. Apply over:
- Clean, smooth gelcoat
- Freshly polished surfaces
- Previously sealed surfaces in good condition
Do NOT apply over:
- Oxidized surfaces (seals in damage)
- Contaminated surfaces (poor bonding)
- Damaged gelcoat (requires repair)
Step 2: Wash Thoroughly
Contaminants under sealant cause adhesion failure and trapped imperfections.
Washing Process
- Rinse entire surface with fresh water to remove loose debris
- Mix marine wash according to directions (not dish soap—it strips protection)
- Wash from top down using a soft mitt
- Pay attention to:
- Waterline (heavy buildup area)
- Around fittings and hardware
- Rub rail crevices
- Textured areas
- Rinse thoroughly from top to bottom
- Dry completely with microfiber towels
Decontamination (If Needed)
For surfaces with bonded contamination:
- Spray lubricant on a small section
- Glide clay bar or mitt across surface
- Feel for contamination pickup (grabbing sensation)
- Fold clay to fresh surface as it loads
- Wipe area clean
- Continue until entire surface feels glass-smooth
Step 3: Prepare the Work Environment
Proper conditions ensure proper curing.
Ideal Conditions
| Factor | Ideal Range | Why It Matters |
|---|---|---|
| Temperature | 50-85°F (10-30°C) | Too cold = slow cure; too hot = flash too fast |
| Humidity | Below 80% | High humidity can affect cure chemistry |
| Direct sun | Avoid | Heats surface, causes uneven cure |
| Wind | Light or none | Dust contamination, rapid drying |
Work Area Setup
- Move to shade or wait for cloud cover
- Ensure surface is cool to touch (not from sitting in sun)
- Mask areas to protect:
- Rubber trim and seals
- Non-skid surfaces (becomes slippery)
- Vinyl and fabric
- Any surfaces you don't want product on
Step 4: Apply the Sealant
Application Methods
Hand Application (Recommended for Most Users):
- Apply a small amount of sealant to foam applicator
- Spread in thin, overlapping passes
- Work in 2x2 foot sections
- Use straight-line or cross-hatch pattern
- Avoid heavy buildup—thin coats cure better
Machine Application:
- Use soft foam finishing pad on DA polisher
- Apply product to pad, not surface
- Spread at low speed (2,500-3,000 OPM)
- Work in overlapping passes
- Keep pad moving—don't dwell in one spot
Application Tips
- Less is more: Thin coats outperform heavy ones
- Work systematically: Top to bottom, section by section
- Refresh applicator: Change pads when loaded with product
- Overlap edges: Prevents gaps in coverage
- Check lighting: Work with consistent light to see coverage
Step 5: Allow Cure Time
Follow product specifications for cure times. For most marine sealants:
Cure Stages
| Stage | Time | Indicator |
|---|---|---|
| Tack-free | 10-15 minutes | Surface doesn't feel sticky |
| Haze | 15-30 minutes | Slight haze appears |
| Buff-ready | 20-45 minutes | Haze fully developed |
| Water-ready | 12-24 hours | Full cure complete |
Factors Affecting Cure
- Higher temperature: Faster cure
- Lower humidity: Faster cure
- Thicker application: Slower cure
- Product variation: Check TDS
Step 6: Buff to Clarity
Once product has hazed:
- Use clean, dry microfiber towel
- Buff in straight lines (not circles)
- Flip towel frequently to fresh surface
- Apply light to moderate pressure
- Check for remaining haze at angles
- Continue until fully clear
Troubleshooting Buffing Issues
Product won't buff clear:
- May not have cured enough—wait longer
- May have been applied too thick—light polish to remove excess
Streaking:
- Too much product—thin next application
- Towel contaminated—use fresh towel
- Buffed too early—wait for full haze
Grabby feel:
- Over-applied or under-cured
- Light polish to correct
Step 7: Apply Second Coat (Optional)
For maximum protection, apply two coats:
- Wait until first coat fully cures (12-24 hours)
- Lightly wipe surface with clean microfiber
- Apply thin second coat
- Buff to clarity as before
- Allow full cure before water exposure
Second coat benefits:
- Fills any gaps in first application
- Builds thicker protective layer
- Extends durability
Step 8: Final Inspection
Before finishing:
- Visual check: Walk around at multiple angles
- Touch test: Surface should feel glass-smooth
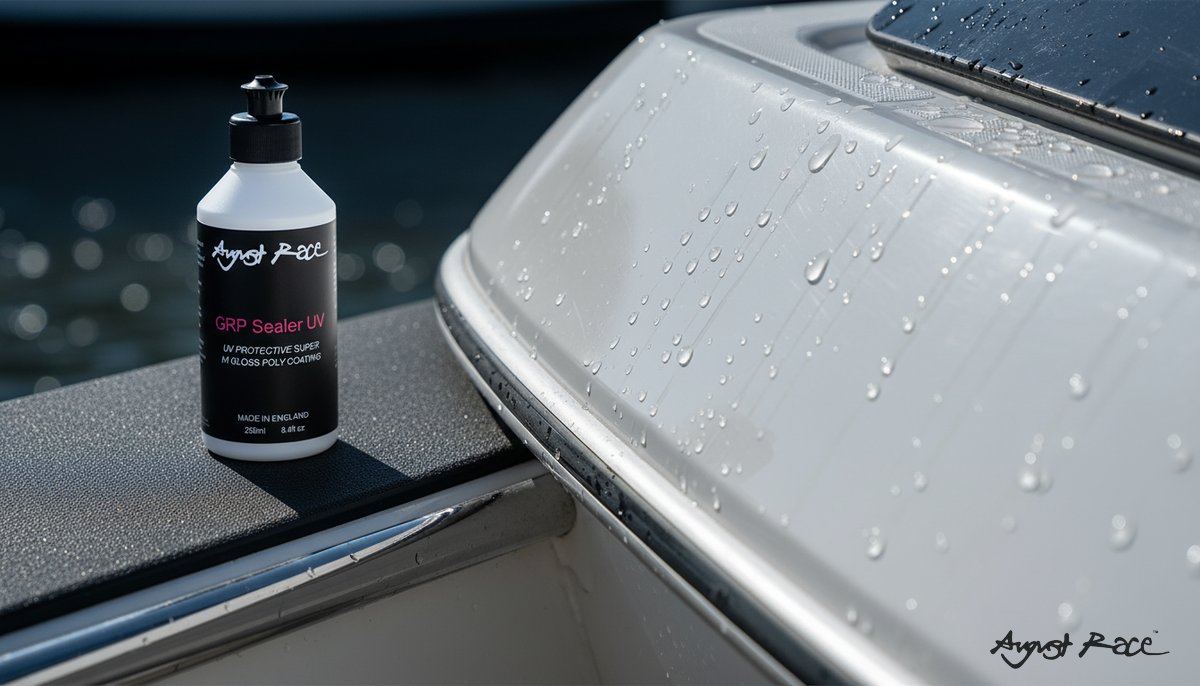
- Water test: Spray water—should bead tightly
- Gloss check: Compare to pre-application (if you measured)
Signs of Successful Application
- High, uniform gloss
- Tight water beading (high contact angle)
- Smooth, slick feel
- No visible residue or streaking
Maintenance Schedule
Protect your work with proper maintenance:
| Frequency | Action |
|---|---|
| After each use | Rinse with fresh water |
| Weekly | Light wash with marine soap |
| Monthly | Thorough wash, beading check |
| Quarterly | Inspect for wear, consider reapplication |
| 3-6 months | Full reapplication |
Extending Sealant Life
- Rinse after saltwater exposure
- Use pH-neutral wash products only
- Avoid abrasive cleaners and brushes
- Cover when stored for extended periods
- Spot-treat high-wear areas more frequently
Common Mistakes and Solutions
| Mistake | Problem | Solution |
|---|---|---|
| Applying too thick | Streaking, slow cure | Thin, multiple coats |
| Skipping prep | Poor adhesion | Always wash and decontaminate |
| Working in sun | Flash, uneven cure | Work in shade |
| Buffing too soon | Product removal | Wait for full haze |
| Contaminated towels | Scratches, streaks | Use dedicated clean towels |
| Neglecting maintenance | Premature failure | Follow wash schedule |
Product Recommendation
GRP Sealer UV is specifically formulated for marine fiberglass:
- UV absorbers for oxidation prevention
- Hydrophobic chemistry for water beading
- Biodegradable formulation
- Gelcoat-specific bonding agents
- 3-6 month durability in typical conditions
For complete protection, use with Boat Wash Pro for maintenance washes.
Frequently Asked Questions
What is the difference between boat sealant and wax?
Boat sealant forms a chemical bond with the gelcoat surface, creating a durable protective layer that lasts 3-6 months. Wax sits on top of the surface as a sacrificial barrier that wears away in 1-3 months. Sealants provide better UV protection and durability.
How long does boat gelcoat sealant take to cure?
Initial cure (dry to touch) typically occurs in 15-30 minutes depending on temperature and humidity. Full cure for water exposure usually requires 12-24 hours. Always check manufacturer specifications as cure times vary by product.
Can I apply boat sealant by hand?
Yes, hand application with foam applicator pads works well for most marine sealants. Apply in thin, overlapping passes and work in manageable sections. Machine application with a DA polisher can speed up large areas but isn't required.
How often should I reapply gelcoat sealant?
In high-UV environments, reapply every 3-4 months. Moderate climates may extend to 4-6 months. Monitor water beading behavior — when water stops beading tightly and begins to sheet, protection is failing and reapplication is needed.
What is the difference between 3M 4200 and 5200?
3M 4200 is a semi-permanent polyurethane adhesive sealant that allows hardware removal with effort. 3M 5200 is a permanent-bond polyurethane designed for below-waterline joints and structural bonds — it's nearly impossible to remove without damaging the substrate. Use 4200 for deck hardware you may need to service; reserve 5200 for permanent installations like through-hulls.
Can you use regular silicone on a fiberglass boat?
Standard household silicone (like bathroom caulk) should not be used on fiberglass boats. It adheres poorly to gelcoat, leaves residue that prevents future sealant adhesion, and offers minimal UV protection. Use marine-grade silicone or, better yet, a polymer surface sealant designed for gelcoat.
How do I prepare fiberglass for sealing?
Wash with marine soap, decontaminate with a clay bar if the surface feels rough, and correct any oxidation with compound and polish before sealing. The gelcoat must be clean, smooth, and free of oils or residue for proper sealant adhesion.
How long does marine sealant last?
Surface sealants last 3-6 months on boats in the water. Bedding compound sealants (polyurethane, polysulfide) last years to decades depending on the product and installation. Longevity depends on UV exposure, saltwater contact, wash frequency, and product quality.
Related Articles
- UV Protection for Boats: Shield Every Surface from Sun Damage
- Spring Boat Prep Checklist 2026
- How to Remove Oxidation from Boat: Complete Guide
- Spring Gelcoat Restoration: Remove Winter Oxidation
- GRP UV Protection: August Race GRP Sealer UV Guide
- Best Boat Wax for Oxidation Protection: Buyer's Guide
- Restore Faded Fiberglass: Complete GRP Repair Guide
About the Expert

David 'Dock' Thompson
Marina Manager, 20+ Years
David has managed marina operations for over two decades. He's seen every maintenance shortcut and knows which products actually hold up across hundreds of boats.
“I've seen a hundred owners make the same mistake. That's why I write it down.”
Get Expert Tips
Subscribe for marine care insights and product updates from industry professionals.
No spam. Unsubscribe anytime.
You May Also Like
August Race GRP Sealer UV: Scalable GRP UV Protection
Protect GRP fleet-wide with a biodegradable, hydrophobic fiberglass sealant. Faster washdowns, longer gloss, and scalable SOPs for busy marinas.
GRP Sealer UV for Marinas: Hi-Gloss, UV Protection
Seal fiberglass from UV across your fleet. August Race GRP Sealer UV delivers a hi-gloss finish, reduces maintenance, and streamlines marina operations.
Best Boat Wax for Oxidation Protection: Buyer's Guide
Find the best boat wax for oxidation protection. Compare marine waxes, sealants, and hybrid products. Learn what makes a boat wax effective against UV damage.