Spring boat prep is the systematic process of cleaning, inspecting, and protecting every surface on your vessel after winter storage before launching for the new season. It covers hull washing, oxidation removal, sealant application, vinyl conditioning, fender maintenance, safety equipment checks, and a full systems inspection. According to BoatUS, a thorough spring commissioning checklist should address hull condition, engine systems, safety gear, and electronics — working top to bottom in a consistent sequence to avoid missing critical items. The U.S. Coast Guard Boater's Guide further emphasizes verifying that all required safety equipment, including PFDs, fire extinguishers, and visual distress signals, is current and functional before every launch. Whether you handle prep yourself or hire a professional ($200 to $600 for commissioning on a typical 25-foot boat), following a structured checklist prevents compounding damage and catches safety issues before they become emergencies.
I've managed marinas for over two decades. Every March, I watch owners pull covers off boats that sat through five months of freeze-thaw cycles, moisture, UV degradation, and dust. Some hulls come out looking like they aged a decade. Others look like they went into storage yesterday. The difference is always the same: a systematic spring prep done in the right order.
Here's the order I use when our detail crew preps boats for launch.
Why Does Spring Detailing Matter?
Skip it and you're not just living with a dull hull. You're accelerating damage.
Neglected gelcoat oxidizes faster with each passing season. Unprotected vinyl cracks under UV. Salt residue left from October corrodes metal hardware through the winter. A proper spring boat maintenance routine:
- Preserves resale value. A well-maintained finish adds thousands at trade-in.
- Stops compounding damage. Small oxidation spots become full restoration jobs in one season.
- Cuts in-season work. Sealed surfaces stay cleaner, longer.
- Forces a full inspection. You'll catch failing hardware, cracked hoses, and soft spots before they become emergencies.
Pro Tip: Photograph your boat's condition before you start. Compare the shots to last year's. You'll spot which areas degrade fastest and where to focus protection.
What Supplies Do You Need?
Gather everything before you start. Nothing kills momentum like a mid-job trip to the chandlery.
| Category | What You Need |
|---|---|
| Washing | Marine boat wash (Boat Wash Pro), wash mitt, two buckets, hose with adjustable nozzle |
| Oxidation removal | Compound or oxidation remover, dual-action polisher or foam pads |
| Protection | Marine wax or ceramic sealant, UV-protective coating (Smooth Opacity UV for gelcoat, GRP Sealer UV for fiberglass) |
| Vinyl & upholstery | Vinyl cleaner and protectant (Vinyl Bright), soft brushes, microfiber towels |
| Fenders & rubber | Fender cleaner (Fender Clean), scrub pad |
| RIB tubes | Inflatable tube cleaner (Liquid RIB), UV tube sealer (LR Sealer UV), low-pressure gauge, microfiber cloths |
| Metal & hardware | Metal polish, corrosion inhibitor, microfiber cloths |
| Inspection | Flashlight, moisture meter (optional), notepad for punch list |
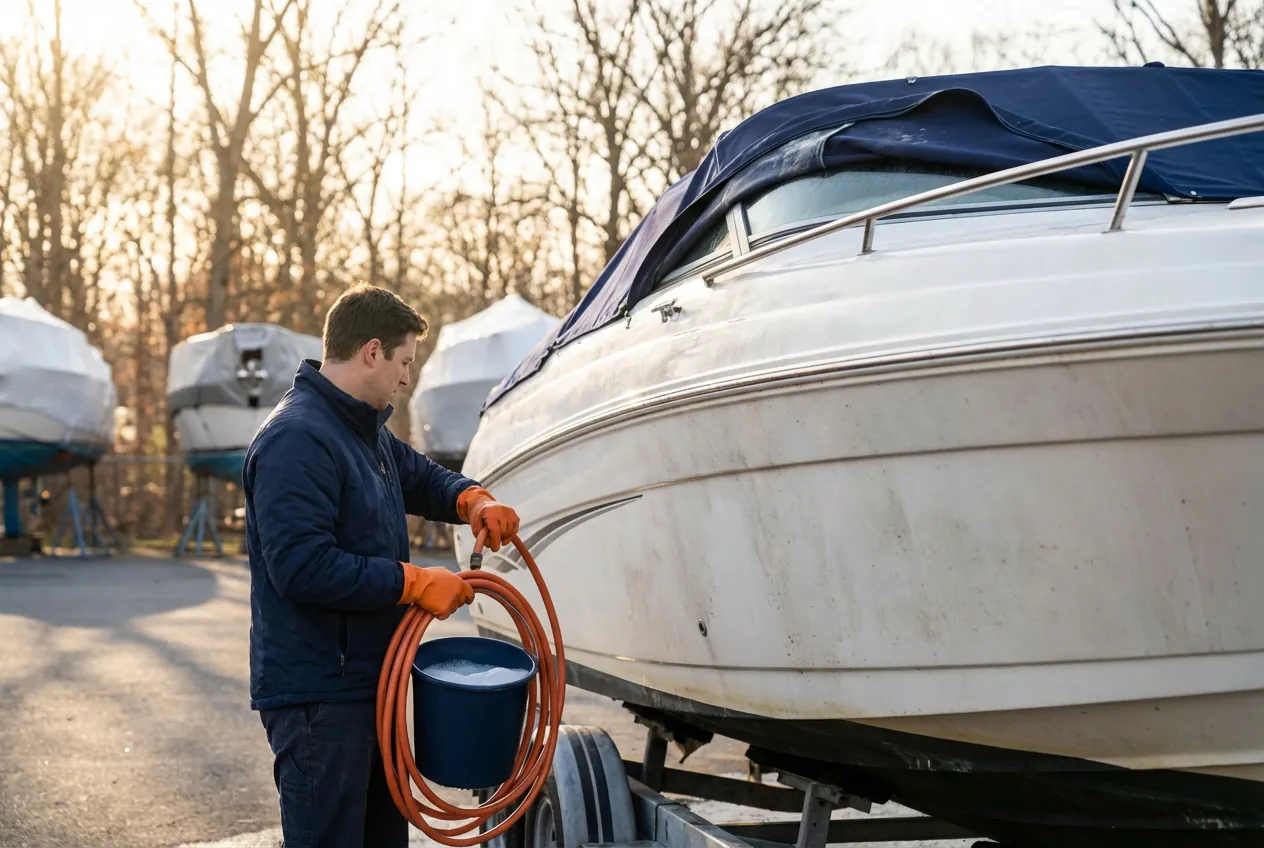
Step 1: Wash the Hull and Topsides
Start here. Always. Anything you compound, polish, or seal over dirt gets trapped against the surface. For the full deep-clean process, see our complete guide to cleaning your boat after winter storage.
Two-bucket method
One bucket holds your wash solution. The second holds clean rinse water. Dip your mitt in wash, clean a section, rinse the mitt in clean water before reloading. This keeps grit out of your wash solution and off the gelcoat.
Use a pH-balanced marine wash like Boat Wash Pro. Dish soap and all-purpose cleaners strip wax and can damage gelcoat. Start from the top (flybridge, hardtop, rails) and work down so dirty runoff doesn't contaminate clean areas.
The waterline
The waterline and boot stripe collect the worst buildup: hard water minerals, algae stains, exhaust soot. Use a stronger dilution of your boat wash with a medium-bristle brush. For stubborn mineral deposits, a mild acid-based hull cleaner works, but test in a hidden spot first.
Pro Tip: Wash on an overcast day. Direct sunlight dries soap on the surface before you can rinse it, leaving streaks that are stubborn to remove on dark hulls.
Step 2: Remove Gelcoat Oxidation
Run your hand along the hull. If you pick up white, chalky residue on your fingers, that's oxidation. UV radiation has broken down the surface resin. Left alone, it eats deeper each year until you need professional wet-sanding or a full repaint.
Assess the severity
- Light: Slight dullness, washed-out color. A one-step cleaner-wax may handle it.
- Moderate: Visible chalking, noticeably faded. You need compound, then polish.
- Heavy: Significant chalking, rough texture, maybe exposed fiberglass weave. Wet-sand (1000 to 2000 grit progression) before compounding. At this point, consider hiring a pro. Our spring gelcoat restoration guide walks through every severity level in detail.
Machine vs. hand
A dual-action polisher cuts the job from a full day to a few hours. Use a cutting pad with compound first, then switch to a polishing pad. If working by hand, use firm overlapping circles and budget three times longer.
Work in 2x2-foot sections. Apply compound, work it until it turns clear, wipe off residue with a clean microfiber.
What causes gelcoat oxidation on boats? Gelcoat oxidation occurs when ultraviolet radiation breaks down the polyester resin on a boat's exterior surface. The degradation causes the resin to chalk and fade, producing a dull, whitish appearance. Salt air, pollutants, and acid rain accelerate the process. Temperature cycling causes micro-cracking that exposes fresh resin to further UV damage. Boats stored outdoors without covers or UV-protective coatings oxidize fastest. The process is cumulative: each season of unprotected exposure penetrates deeper into the gelcoat layer. Light oxidation can be reversed with polishing compounds, but severe cases may require wet-sanding or professional restoration. Applying a UV-inhibiting sealant after compounding is the most effective way to slow future oxidation and maintain gloss between seasons.
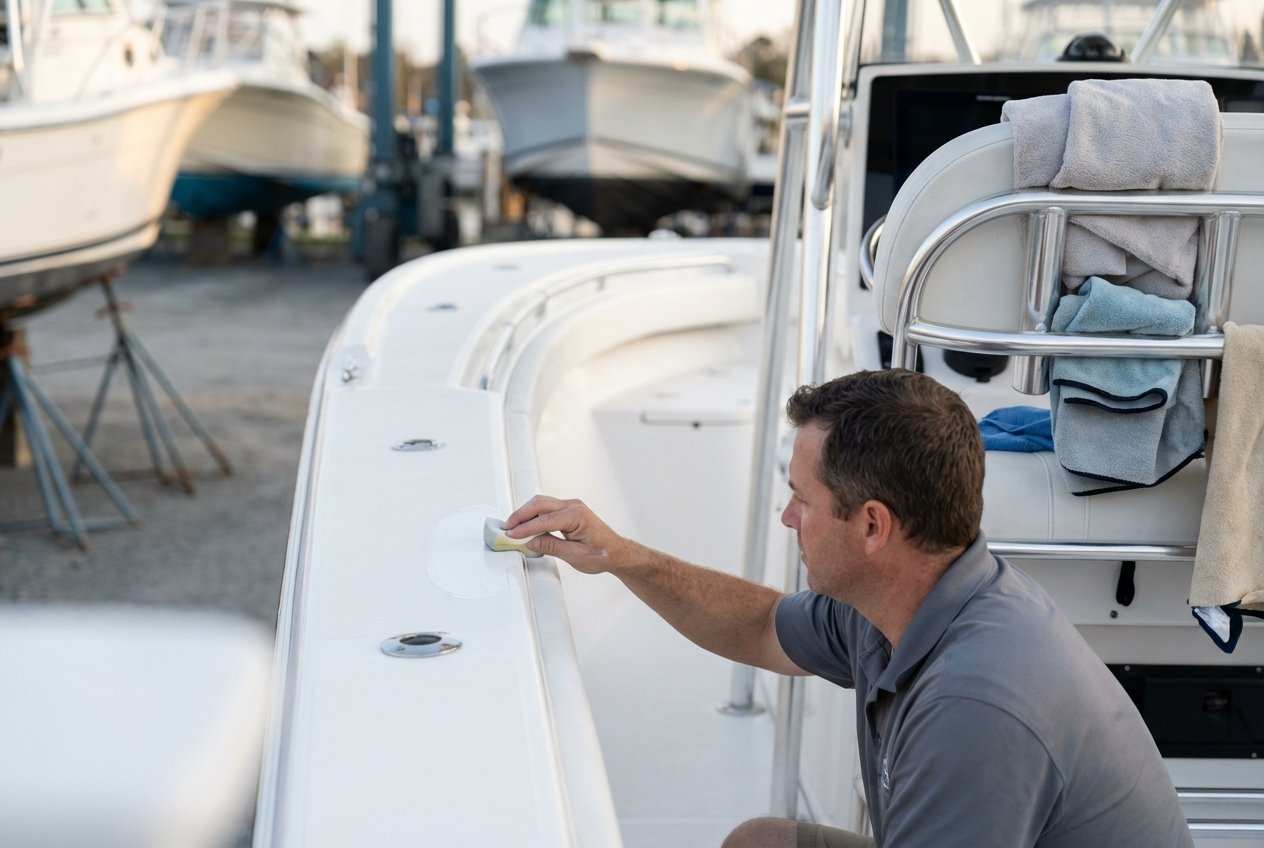
Step 3: Apply Wax or Sealant
After compounding, the gelcoat is clean and smooth but unprotected. This is the window that matters. Two options:
Traditional marine wax
Carnauba-based waxes give a deep, warm gloss. Easy to apply. The tradeoff: most last 1 to 3 months on a boat that lives in the water. You'll reapply mid-season. For a full breakdown of wax vs. sealant vs. ceramic, see our spring boat waxing guide.
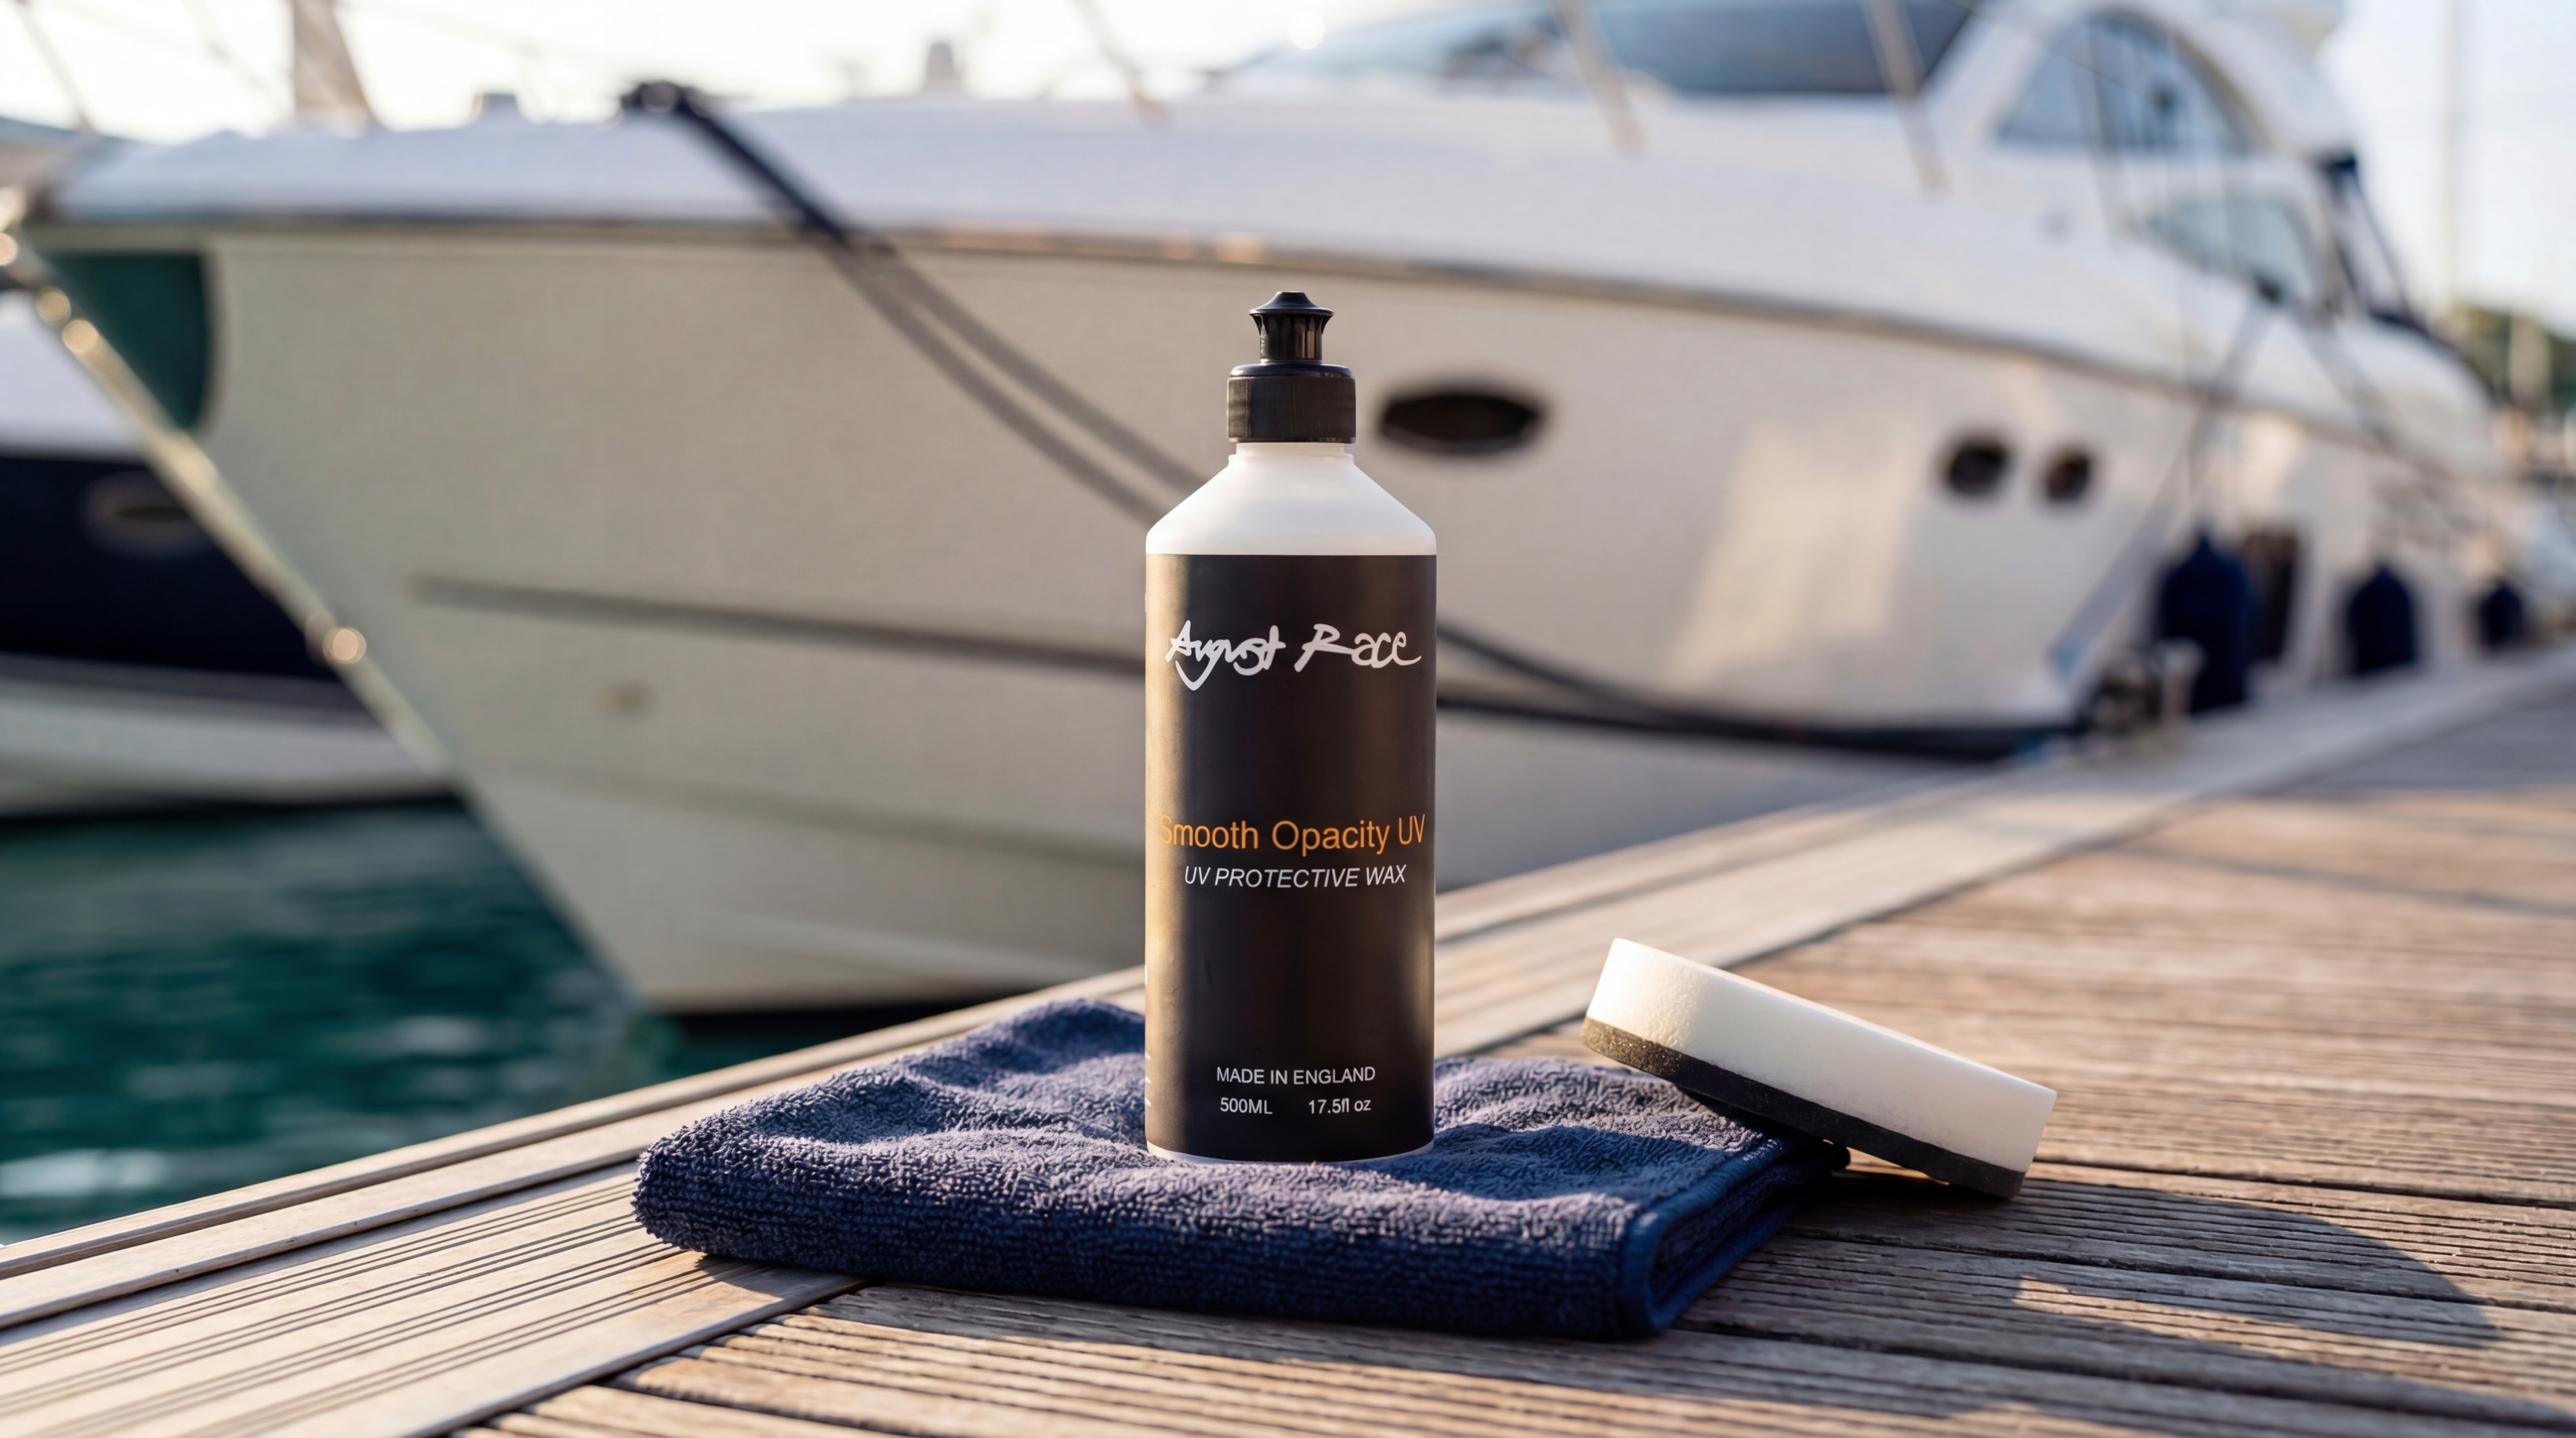
Ceramic-style sealants
Products like Smooth Opacity UV (dedicated ultraviolet protection) bond chemically to gelcoat instead of sitting on top. They last 3 to 6 months and resist salt, UV, and waterline staining far better than wax.
For fiberglass specifically, GRP Sealer UV provides UV inhibition plus hydrophobic water sheeting, formulated for the porosity of GRP surfaces.
Application tips
- Surface must be completely clean. Residual compound, oils, or dust prevent proper bonding.
- Thin, even coats. More product means harder buffing, not more protection.
- Respect cure time. Most sealants need 1 to 4 hours before water exposure.
- Layer high-wear areas. Bow, waterline, and transom benefit from a second coat.
Pro Tip: Seal your stainless hardware (rails, cleats, hinges) at the same time. The coating blocks salt corrosion and makes season-long cleaning far easier.
How long does marine sealant last on a boat? Marine ceramic-style sealants last 3 to 6 months on boats kept in the water, compared to 1 to 3 months for traditional carnauba wax. Longevity depends on UV intensity, whether the boat is moored or trailered, saltwater versus freshwater use, and wash frequency. Sealants bond chemically to gelcoat, forming a semi-permanent hydrophobic layer that repels water, salt, and organic contaminants. This chemical bond gives them superior durability over waxes, which sit on the surface and wear away mechanically. To maximize sealant life, apply to a freshly compounded surface free of oils and residue, and wash with pH-neutral products that won't degrade the coating. One spring application carries most boaters through the full season.
Step 4: Clean and Protect Vinyl and Upholstery
Vinyl seats, bolsters, and helm pads take punishment from every direction: UV, body oils, sunscreen, mildew, salt spray. Spring is your chance to reset before the damage stacks up.
Cleaning process
- Vacuum or brush loose debris first. Sand grinds into vinyl during cleaning if left on the surface.
- Spray Vinyl Bright or your marine vinyl cleaner and let it dwell 30 to 60 seconds.
- Agitate with a soft brush in straight lines, not circles.
- Wipe clean with a damp microfiber. Flip the towel often.
- Check seams, folds, and undersides for mildew. Treat it before it spreads. Got a serious mildew problem? Our vinyl and upholstery mildew cleaning guide covers the full removal and prevention process.
UV protection
Most quality vinyl cleaners include UV inhibitors. For boats on uncovered lifts or moorings, a dedicated vinyl protectant after cleaning adds a second line of defense. White and light-colored vinyl shows UV damage as yellowing and cracking first.
Pro Tip: Flip your cushions and clean underneath. Mildew starts where cushions contact fiberglass storage areas and migrates upward through the foam. Catching it here saves expensive re-upholstering later.
Step 5: Clean the Fenders
Dirty fenders hanging off a freshly detailed hull ruin the whole job. Worse, they transfer dock grime back to the hull every time they make contact.
How to clean them
Standard fenders collect dock grime, algae, and black scuff marks that resist normal soap and water. Fender Clean dissolves these contaminants without degrading the vinyl or rubber. Apply, wait a minute, scrub with a medium-bristle brush, rinse.
When to replace
Check each fender for:
- Cracks or splits in the shell
- Air pressure that won't hold after re-inflation
- Permanent deformation from dock compression
- Degraded covers on textile-sheathed fenders
Fenders are safety equipment. One that fails under load causes hull damage that costs 20 times what a replacement fender costs.
RIB owners: Your inflatable tubes need their own spring prep routine beyond fender care. The next section covers the basics, or see our complete spring RIB and inflatable prep guide for the full process.
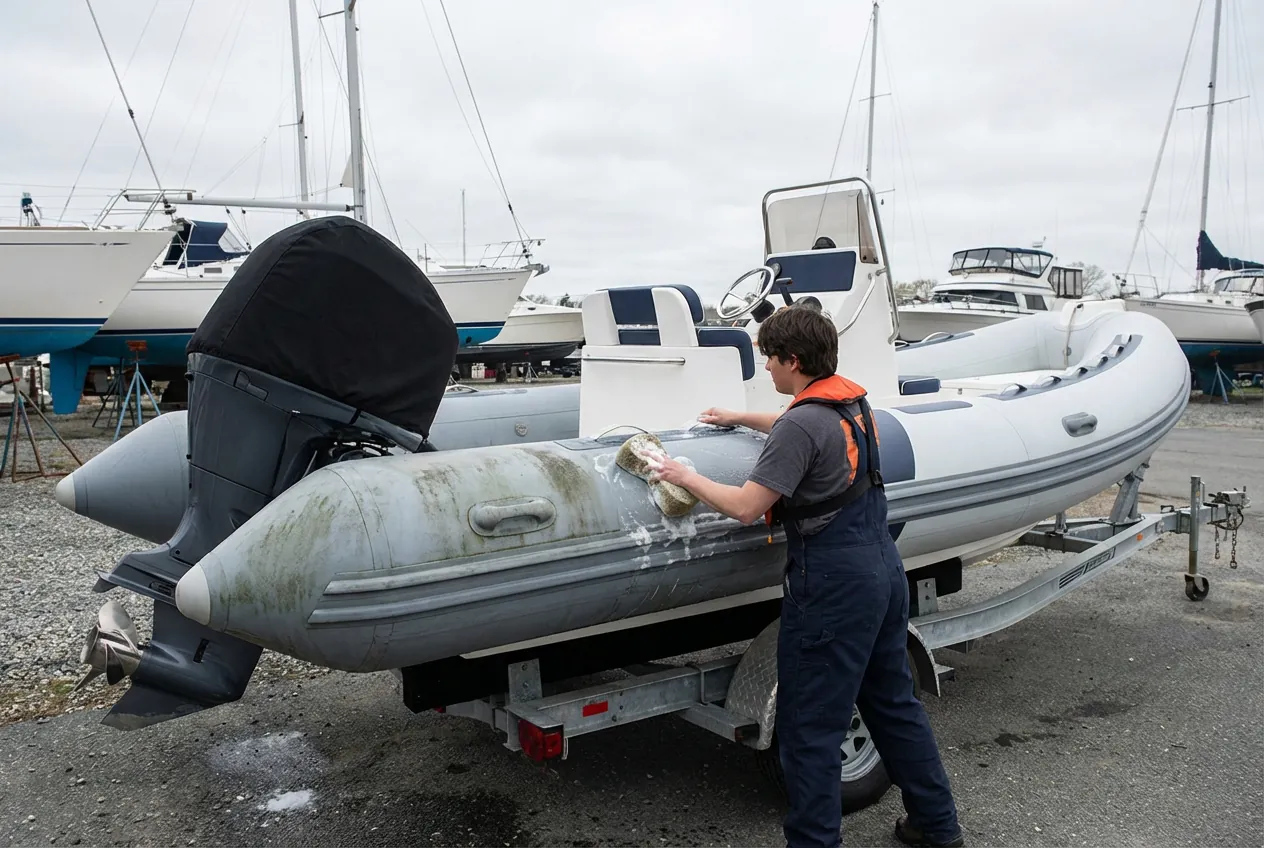
Step 6: Clean and Protect RIB Tubes
If you own a RIB or any boat with inflatable tubes, this step is non-negotiable. Hypalon and PVC degrade differently than fiberglass, and they need dedicated products.
Cleaning inflatable tubes
Winter storage leaves oxidation, carbon marks, and embedded grime on tube surfaces. Standard boat wash won't cut it here.
- Apply Liquid RIB directly onto the tube surface. Work in sections no longer than 3 feet at a time — the product needs to stay wet while you work it.
- Use a clean microfiber cloth in circular motions to lift grime and oxidation.
- Rinse each section thoroughly with fresh water before moving to the next.
- For lighter maintenance washes, dilute Liquid RIB up to 1:1 with fresh water.
UV protection
Unprotected tubes chalk, crack, and fade within a single season of sun exposure. After cleaning, apply LR Sealer UV to seal and protect:
- Make sure tubes are completely clean and dry.
- Apply a small amount of LR Sealer UV to a clean microfiber cloth.
- Work evenly across the tube surface, letting it absorb fully.
- Buff lightly with a dry cloth for a uniform glossy finish.
A little goes a long way — one application provides months of UV defense on both Hypalon and PVC, including fabric-impression finishes.
Pressure and seam check
While you're working on the tubes, check inflation pressure with a low-pressure gauge. Look for:
- Soft spots that could indicate slow leaks
- Seam separation or lifting at glue joints
- Valve leaks (apply soapy water around each valve and watch for bubbles)
- Chafe damage where tubes contact the hull or trailer
Catch a slow leak now and you fix it in the yard. Miss it and you're troubleshooting on the water.
For the complete tube cleaning, sealing, and inspection process — including Hypalon vs. PVC differences — see our spring RIB and inflatable prep guide.
Step 7: Final Inspection
Detailing done. Now walk the boat with fresh eyes and a punch list. This step catches everything the detail work revealed.
Exterior
- All gelcoat clean, polished, sealed
- No visible oxidation or chalking
- Metal hardware polished, corrosion-free
- Rub rail clean, no dock scuffs
- Non-skid decking clean (never wax non-skid surfaces)
- Canvas, eisenglass, zippers cleaned and treated
- Fenders cleaned, inflated, lines intact
- RIB tubes cleaned, sealed, pressure checked (if applicable)
Interior
- Vinyl and upholstery cleaned and protected
- Bilge clean, no oil or standing water
- Storage compartments dry
- Headliner mildew-free
- Flooring vacuumed and treated
Safety equipment (USCG requirements)
According to the U.S. Coast Guard Boater's Guide, every recreational vessel must carry the following before launch:
- PFDs: One properly sized, Coast Guard-approved life jacket per person on board, plus a throwable Type IV device for boats 16 feet and over
- Fire extinguishers: Check gauge pressure and inspection tags. The USCG updated fire extinguisher requirements in 2022 — disposable extinguishers older than 12 years must be replaced regardless of gauge reading
- Visual distress signals: Required on coastal waters. Check expiration dates on flares (they expire after 42 months)
- Sound-producing device: Horn or whistle in working condition
- Navigation lights: Test all lights with the switch, not just a visual check of the bulbs
Pro Tip: Schedule a free vessel safety check through the U.S. Coast Guard Auxiliary or U.S. Power Squadrons before your first outing. They inspect your boat at no cost and issue a safety decal.
Systems spot-check
- Navigation lights working
- Horn working
- Bilge pump cycles
- Battery terminals clean and tight
- Through-hulls and seacocks move freely
- Engine visual: fluid levels, belt condition, corrosion
DIY vs. Professional: An Honest Comparison
| Factor | DIY | Professional |
|---|---|---|
| Cost | $150 to $400 in products | $15 to $50/ft (30-ft boat: $450 to $1,500) |
| Time | 8 to 16 hours | 4 to 8 hours with a crew |
| Equipment | You buy a DA polisher, pads, buckets | Included |
| Skill risk | Moderate. Burning through gelcoat is real. | Low. Pros compound daily. |
| Best for | Boats under 30 ft, light oxidation, owners who enjoy the work | Boats over 30 ft, heavy oxidation, limited time |
| Product control | You pick what goes on your boat | Detailer uses their stock unless you specify |
Pro Tip: Split the job. Wash, vinyl, and fenders yourself. Hire a pro for compounding and sealing the hull. You save money on the easy stuff and get expert results where technique matters most. Curious what the pros actually do? Our professional spring detailing workflow breaks down the full 8-phase process.
How much does professional boat detailing cost? Professional boat detailing costs between $15 and $50 per linear foot. A 25-foot boat runs $375 to $1,250 depending on condition and scope. Basic wash-and-wax packages sit at the lower end. Full spring commissioning details, including compounding, ceramic sealant, vinyl restoration, and metal polishing, cost more. Location matters: coastal Florida and Chesapeake marinas charge less per foot than New England or Pacific Northwest due to higher competition. Most detailers charge extra for wet-sanding, teak work, or bottom paint. Get itemized quotes from three detailers, tell them which products you want used, and book early. Prices go up 15 to 20 percent once the pre-launch rush starts in late March.
Timeline: When to Start
Regional conditions determine your start date. Gulf Coast and Florida boaters may begin commissioning as early as February, while the Great Lakes and New England typically target April or May launches. According to the National Marine Manufacturers Association (NMMA), peak spring commissioning demand hits in March and April nationwide, so booking professional services early avoids the rush and saves 15 to 20 percent on pricing.
| Region | Typical Launch Window | Start Prep By |
|---|---|---|
| Gulf Coast / South Florida | February – March | January |
| Mid-Atlantic / Chesapeake | April – May | Late February |
| Great Lakes / Northeast | May – June | March – April |
| Pacific Northwest | May – June | March – April |
| Southern California | Year-round (refit in winter) | January – February |
6 to 8 weeks before launch
- Order products
- Book professional detailing if outsourcing
- Pull the cover, assess condition
4 to 6 weeks out
- Wash hull and waterline
- Compound and remove oxidation
- Fix gelcoat chips, scratches, gouges
2 to 4 weeks out
- Apply sealant or wax
- Clean vinyl, upholstery, canvas
- Clean fenders, inspect dock lines
1 week out
- Final inspection walkthrough
- Touch up areas disturbed by other commissioning work
- Clean and organize interior
Launch day
- Quick rinse (yard dust)
- Wipe down helm and seats
- Take a photo. You earned it.
Six Mistakes I See Every Spring
-
Household cleaners on gelcoat. Dish soap strips wax. Bathroom cleaners discolor vinyl. Use marine-specific products.
-
Waxing over contamination. If you didn't compound first, you're sealing in the grime you should be removing.
-
Polishing without sealing. Freshly compounded gelcoat with no sealant oxidizes faster than the old surface did. Always seal.
-
Waxing non-skid. Safety hazard. Clean non-skid areas but never coat them with anything slippery.
-
Ignoring hatch undersides. Moisture and mildew hide here all winter and spread to visible surfaces once the boat heats up.
-
Buffing in direct sun. Compound cures too fast, won't come off cleanly, and can leave permanent haze marks.
The Bottom Line
Spring boat prep is sequential, not complicated. Wash, compound, seal, clean vinyl, clean fenders, inspect. Same order whether you're running a 19-foot center console or a 45-foot cruiser.
The work you put in now means less scrubbing on weekends, better-looking surfaces in August, and a boat that holds its value when you're ready to move up.
Frequently Asked Questions
When should I start spring boat prep?
Start 6 to 8 weeks before your planned launch date. Order products and book professional detailing first, then begin hull washing and oxidation removal 4 to 6 weeks out. Apply sealant and clean interior 2 to 4 weeks before launch.
What causes gelcoat oxidation on boats?
Gelcoat oxidation occurs when ultraviolet radiation breaks down the polyester resin on a boat's exterior surface. The degradation causes chalking and fading. Salt air, pollutants, acid rain, and temperature cycling accelerate the process. Boats stored outdoors without covers or UV-protective coatings oxidize fastest.
How long does marine sealant last on a boat?
Marine ceramic-style sealants last 3 to 6 months on boats kept in the water, compared to 1 to 3 months for traditional carnauba wax. Longevity depends on UV intensity, saltwater versus freshwater use, and wash frequency.
How much does professional boat detailing cost?
Professional boat detailing costs between $15 and $50 per linear foot. A 25-foot boat runs $375 to $1,250 depending on condition and scope. Full spring commissioning details cost more than basic wash-and-wax packages. Book early — prices rise 15 to 20 percent once pre-launch rush starts.
Should I wax or seal my boat in spring?
Sealants outperform wax for spring prep. They bond chemically to gelcoat, lasting 3 to 6 months versus 1 to 3 months for wax. One spring sealant application typically carries you through the full boating season without reapplication.
What safety equipment does the Coast Guard require?
The U.S. Coast Guard requires all recreational boats to carry properly sized PFDs for every person on board, a throwable flotation device for boats 16 feet and over, a sound-producing device, visual distress signals for coastal waters, and fire extinguishers based on vessel length and engine type. Check your extinguisher gauges and PFD condition every spring before launch.
How much does spring commissioning cost?
Professional spring commissioning typically costs $200 to $600 for a 20- to 30-foot boat, depending on scope. Basic engine dewinterization and fluid changes run $200 to $350. Adding a full detail with compounding, sealant, and vinyl care brings the total to $600 to $1,200. DIY commissioning costs $100 to $300 in products and fluids.
More detailing guides at augustrace.us/learn. Questions about product selection? Contact us.
About the Expert

David 'Dock' Thompson
Marina Manager, 20+ Years
David has managed marina operations for over two decades. He's seen every maintenance shortcut and knows which products actually hold up across hundreds of boats.
“I've seen a hundred owners make the same mistake. That's why I write it down.”
Get Expert Tips
Subscribe for marine care insights and product updates from industry professionals.
No spam. Unsubscribe anytime.
You May Also Like
How to Clean Your Boat After Winter Storage
A marina manager's step-by-step guide to cleaning your boat after winter storage, covering exterior wash, interior mildew removal, and the mistakes that cause real damage every spring.
Spring Gelcoat Restoration: How to Remove Winter Oxidation
A marine technician's field guide to assessing and restoring gelcoat oxidation after winter storage, from light haze to heavy chalking, with product recommendations and prevention strategies.
Spring RIB & Inflatable Prep: Tube Cleaning and UV Protection
A charter captain's field guide to spring RIB prep, covering inflatable tube inspection, proper cleaning for Hypalon and PVC, and UV protection that prevents costly tube replacement.