What Causes Winter Mildew on Boat Upholstery?
What causes winter mildew on boat upholstery? Mildew is a surface fungus that colonizes marine vinyl when three conditions align: moisture above 60% relative humidity, temperatures between 40°F and 100°F, and limited airflow. During winter storage, trapped condensation beneath covers and inside compartments creates the exact environment mildew needs to feed on plasticizers, dirt, and body oils embedded in your seats.
I open somewhere around 200 boats every spring. I'd estimate 80% of them have some degree of mildew on the upholstery. The remaining 20%? Their owners either followed a serious prevention protocol or got lucky with a dry winter. After fifteen years running my detailing business, I can tell you luck is not a strategy.
This guide walks you through my exact process for removing winter mildew from boat seats, protecting the vinyl afterward, and setting your boat up so this problem doesn't repeat next year. If you've already tackled your spring prep checklist, this is the next step.
Why Is Mildew Almost Inevitable After Winter Storage?
Most boat owners assume a good cover solves the moisture problem. It doesn't. A cover keeps rain and debris off, but it also creates a sealed environment. Here's what happens inside that covered boat from November through March:
Temperature swings create condensation. Even in covered storage, daytime warming and nighttime cooling produce moisture on every hard surface. That moisture wicks into seat cushions, pools under vinyl, and saturates foam cores. The American Boat and Yacht Council (ABYC) emphasizes proper ventilation in its standards because boats stored without airflow can reach dangerously high humidity levels within weeks of being covered, creating ideal conditions for mildew growth.
Organic residue is mildew food. Sunscreen, fish blood, sweat, drink spills, and even dust provide nutrients. If you didn't do a thorough cleaning before winterizing, you left a buffet for fungal growth.
Darkness accelerates colonization. UV light from the sun inhibits mildew. Covered boats sit in near-total darkness for months. Remove that natural inhibitor and mildew spreads faster.
Winter mildew on boat upholstery develops when covered boats trap condensation from daily temperature fluctuations, creating humidity levels above 60% in enclosed spaces. The combination of residual organic material on vinyl surfaces, including body oils, sunscreen residue, and environmental debris, provides a nutrient base for fungal colonies. Without UV exposure to inhibit growth and with no active airflow to reduce moisture, mildew can establish visible colonies on marine vinyl within 24 to 48 hours of conditions becoming favorable. Boats stored for four to five months under non-ventilated covers are among the most likely to develop significant mildew contamination, regardless of the quality of the vinyl or the age of the vessel.
According to Phillip Liberson, a marine upholstery specialist quoted in Boating Magazine, mildew often establishes in the foam beneath vinyl seats before it becomes visible on the surface — meaning the visible spots you see in spring represent a more extensive colony underneath. This is why pulling cushions and inspecting both sides is a critical first step.
One factor worth noting: marine vinyl quality varies significantly in mildew resistance. Vinyl manufactured to ASTM G21 testing standards (the standard practice for determining resistance of synthetic polymeric materials to fungi) demonstrates measurably better mildew resistance than generic vinyl. If you're replacing seats, specifying ASTM G21-rated vinyl is one of the best long-term investments you can make against recurring mildew problems.
I say this not to discourage you but to set expectations. Mildew after winter storage is normal. The goal is removing it without damaging your vinyl and then preventing it from coming back.
How Do You Assess Mildew Damage on Boat Seats?
Before you grab a bottle of anything, stop and look. Not all mildew damage is the same, and misidentifying what you're dealing with leads to wasted effort or, worse, permanent damage to your upholstery.
Surface Mildew
This is the most common type I see. It appears as black, gray, or green spotting on the vinyl surface. Wipe it with a dry microfiber cloth. If the spots smear or partially transfer to the cloth, you're dealing with surface mildew. Good news: this responds well to proper cleaning.
Deep Staining
When mildew sits on vinyl for months, its metabolic byproducts (yes, mildew produces waste) penetrate into the grain texture and sometimes into the vinyl itself. You'll know you have deep staining when the surface cleans up but shadow marks remain. These require repeated treatment sessions and sometimes light abrasive techniques.
Structural Damage
This is the worst case. If the vinyl feels stiff, cracks when you flex it, or the foam underneath is soggy and smells musty even after drying, you've moved beyond cleaning into replacement territory. Mildew can break down the plasticizers that keep vinyl flexible, and once the foam core is compromised, no amount of surface cleaning fixes the problem.
| Damage Level | Visual Signs | Touch Test | Smell | Treatment Path |
|---|---|---|---|---|
| Surface mildew | Black/gray/green spots | Vinyl still soft and flexible | Mild musty odor on surface | Single cleaning session |
| Deep staining | Shadow marks after cleaning | Vinyl flexible but discolored | Moderate odor, fades with airflow | Multiple treatment sessions |
| Structural damage | Cracking, hardened areas | Stiff, brittle, foam feels wet | Strong persistent mildew smell | Replacement or reupholstery |
Spend five minutes assessing before you start cleaning. It saves you from scrubbing a seat that needs replacement and from replacing a seat that just needs proper cleaning.
What Products Should You Never Use on Marine Vinyl?
I get more calls about vinyl damage from bad cleaning products than from mildew itself. Here's my short list of what to keep away from your boat seats, and the specific reasons why.
Household Bleach (Sodium Hypochlorite)
Bleach kills mildew. It also attacks the plasticizers in marine vinyl. Plasticizers are the chemical compounds that keep vinyl soft and flexible. Strip them out and the vinyl hardens, cracks, and turns chalky within months. I've seen boat owners bleach their seats in April and need full reupholstery by August. Sodium hypochlorite degrades PVC-based materials through oxidation of plasticizer compounds, a reaction well documented in polymer chemistry and marine industry maintenance guides.
Even diluted bleach causes cumulative damage. Each application removes more plasticizer. The vinyl might look clean today, but you're shortening its life by years.
Magic Erasers (Melamine Foam)
A Magic Eraser is micro-abrasive. It works by physically sanding the surface at a microscopic level. On marine vinyl, it strips the protective topcoat, which is the UV-resistant layer that prevents fading and cracking. Without that topcoat, UV damage accelerates and the vinyl becomes porous, making it easier for the next round of mildew to take hold.
I've cleaned boats where the owner used a Magic Eraser on the helm seat only. You can see the difference: the erased area is duller, rougher, and already showing hairline cracks while the untouched seats next to it still look factory-fresh.
Acetone and Solvent-Based Cleaners
Acetone dissolves vinyl. Not slowly, not subtly. It strips the surface, removes printed patterns, and can eat through thinner vinyl in minutes. Any solvent-based cleaner (mineral spirits, lacquer thinner, MEK) does similar damage. These have no place in boat upholstery care.
Three common household products cause the most damage to marine vinyl during mildew cleaning attempts. Household bleach containing sodium hypochlorite degrades vinyl plasticizers through chemical oxidation, leading to hardening and cracking within months of repeated use. Melamine foam pads, sold as Magic Erasers, act as micro-abrasives that remove the UV-protective topcoat from marine vinyl, accelerating sun damage and creating a porous surface that absorbs future stains more readily. Acetone and solvent-based cleaners dissolve the vinyl surface itself, stripping printed patterns and weakening the material's structural integrity. Professional marine detailers recommend pH-balanced cleaners formulated for PVC-based marine upholstery to remove mildew without compromising the vinyl's protective layers or long-term flexibility.
What Is the Step-by-Step Process for Removing Boat Seat Mildew?
Here's the process I use on every mildew job. It works on white, colored, and textured marine vinyl. Take your time with each step. Rushing through mildew removal leads to recontamination.
Step 1: Dry Brush Loose Mildew
Start with a dry, soft-bristle brush (a dedicated detailing brush or a clean shoe brush works). Brush mildew spores off the surface before introducing any liquid. This matters because wetting active mildew first can push spores deeper into the vinyl grain.
Brush in one direction, away from clean areas. Work from the least affected areas toward the worst. Knock the brush clean frequently or use compressed air to clear it. Wear a dust mask during this step. Mildew spores are respiratory irritants.
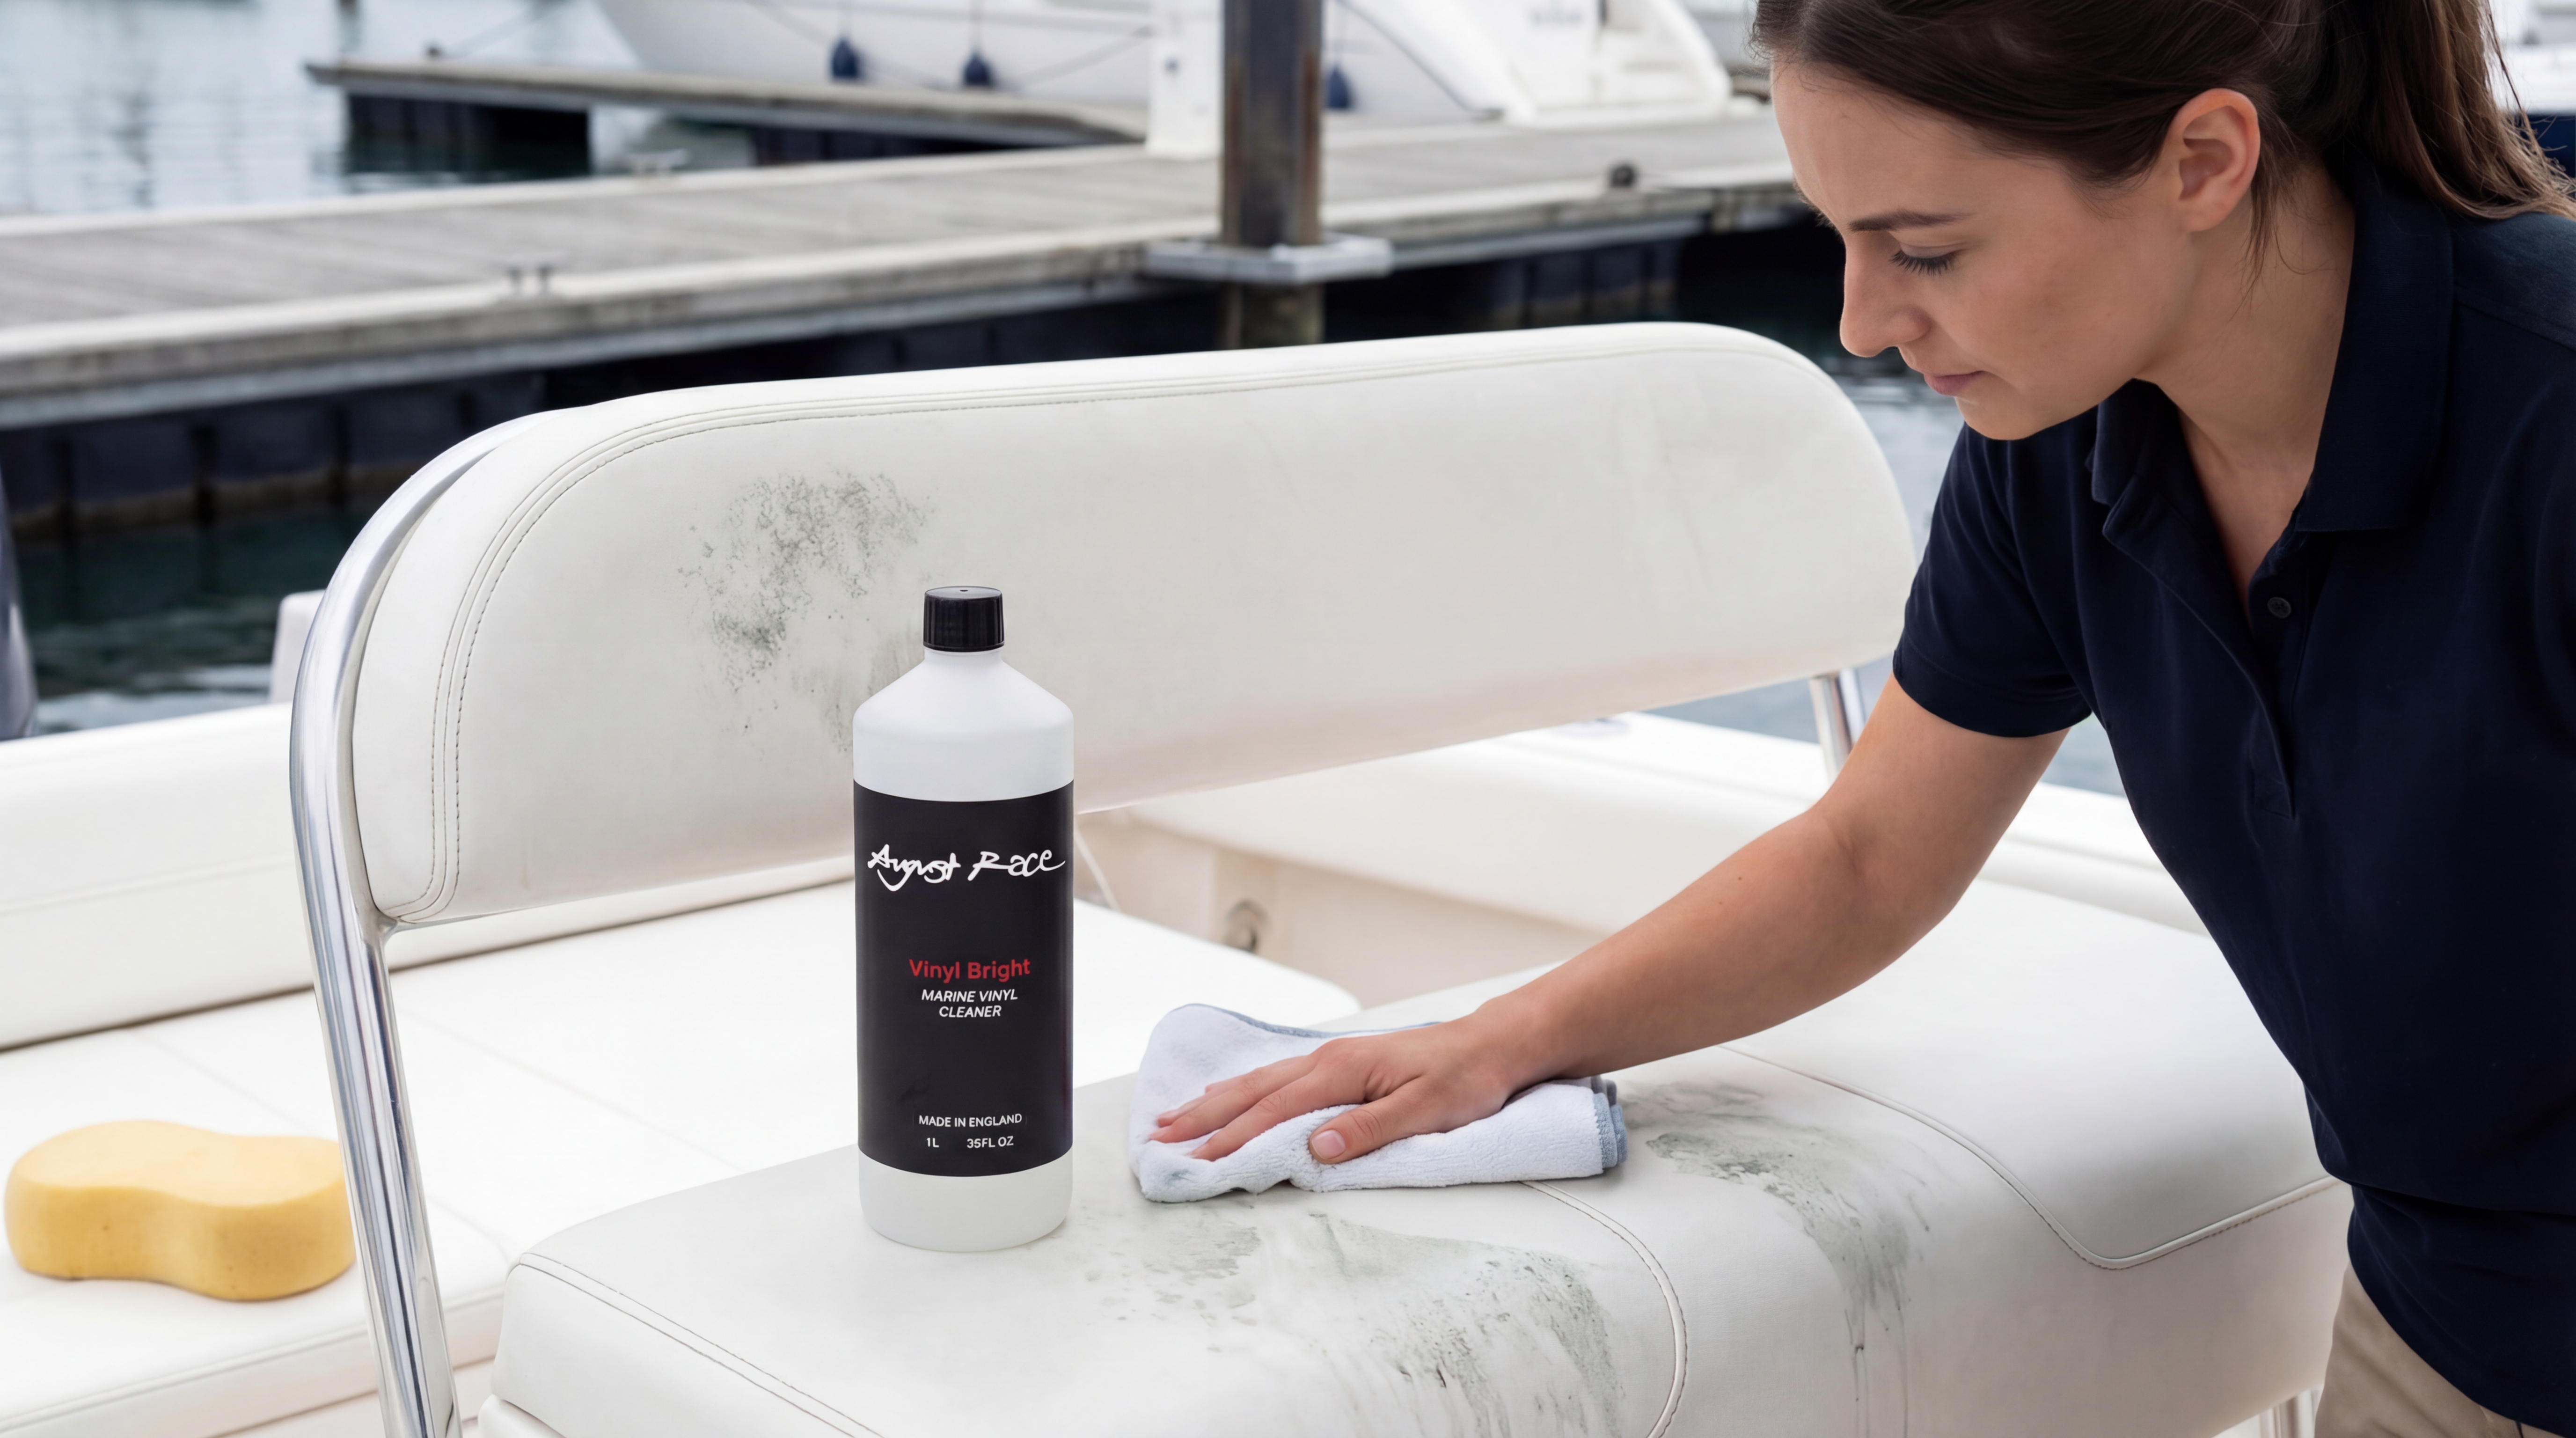
Step 2: Apply a pH-Balanced Marine Vinyl Cleaner
Spray your cleaner across the affected area. I use Vinyl Bright for mildew work because it's formulated to break down organic staining without stripping plasticizers. Spray enough to keep the surface wet but not dripping. Let it dwell for 3-5 minutes. Dwell time matters. The cleaner needs time to break the bond between mildew waste products and the vinyl surface.
For general grime around the mildew areas, Boat Wash Pro handles the job. But for the mildew itself, you want a dedicated vinyl cleaner.
Step 3: Agitate with a Soft Brush
After dwell time, scrub with a soft-bristle brush using small circular motions. Apply moderate pressure. You're not trying to sand the mildew off; you're working the cleaner into the grain where spores hide. On textured vinyl (pebble grain, diamond stitch patterns), spend extra time in the recessed areas. That's where mildew concentrates.
Step 4: Wipe and Rinse
Wipe the area with a clean, damp microfiber towel. Flip the towel frequently to avoid redepositing what you just removed. Follow up with a light freshwater rinse. Don't soak the seats; you want to remove cleaner residue without saturating the foam underneath.
Step 5: Dry Thoroughly
This step gets skipped more than any other, and it's one of the most important. Towel dry the surface, then let the seats air dry in direct sunlight for at least 30 minutes. UV exposure kills remaining spores and ensures moisture doesn't linger in seams or stitching channels.
If you're working in a covered marina or on an overcast day, use a portable fan to keep air moving across the seats while they dry.
Step 6: Repeat for Stubborn Staining
Deep staining won't come out in one pass. Apply Vinyl Bright again, increase dwell time to 8-10 minutes, and agitate more deliberately in the stained areas. I've had seats require three or four treatment rounds spaced over two days. Patience here prevents the temptation to reach for harsher chemicals that will damage the vinyl.
For a more detailed breakdown of vinyl cleaning techniques beyond mildew, see our full guide on boat vinyl and upholstery cleaning.
What About Under the Seat Cushions and Inside Storage Compartments?
Here's where I see boat owners make their biggest mistake: they clean the seat surfaces and ignore everything underneath. Mildew doesn't stop at the top of the cushion. It colonizes the underside of removable cushions, the fiberglass surfaces beneath them, hinge hardware, and every compartment liner in the boat.
Removable Cushions
Pull every cushion out. Flip it over. Chances are, the bottom has more mildew than the top because moisture pools against the seat base and the underside never gets airflow or UV.
Clean the bottom with the same process described above. While the cushions are out, inspect the foam. Compress it and smell it. If the foam smells musty even after the vinyl surface is clean, the mildew has penetrated the foam core. At that point, the foam needs replacing. A good marine upholsterer can refoam a cushion without replacing the vinyl cover.
Fiberglass Seat Bases and Compartments
Spray down exposed fiberglass with Boat Wash Pro and wipe clean. Pay attention to drain channels and scupper holes. Clogs in these drains are often the original cause of moisture buildup that led to the mildew. Clear them with a pipe cleaner or compressed air.
Dry everything before reinstalling cushions. I use a leaf blower on low speed to force air through compartments and drain channels. It sounds excessive. It works.
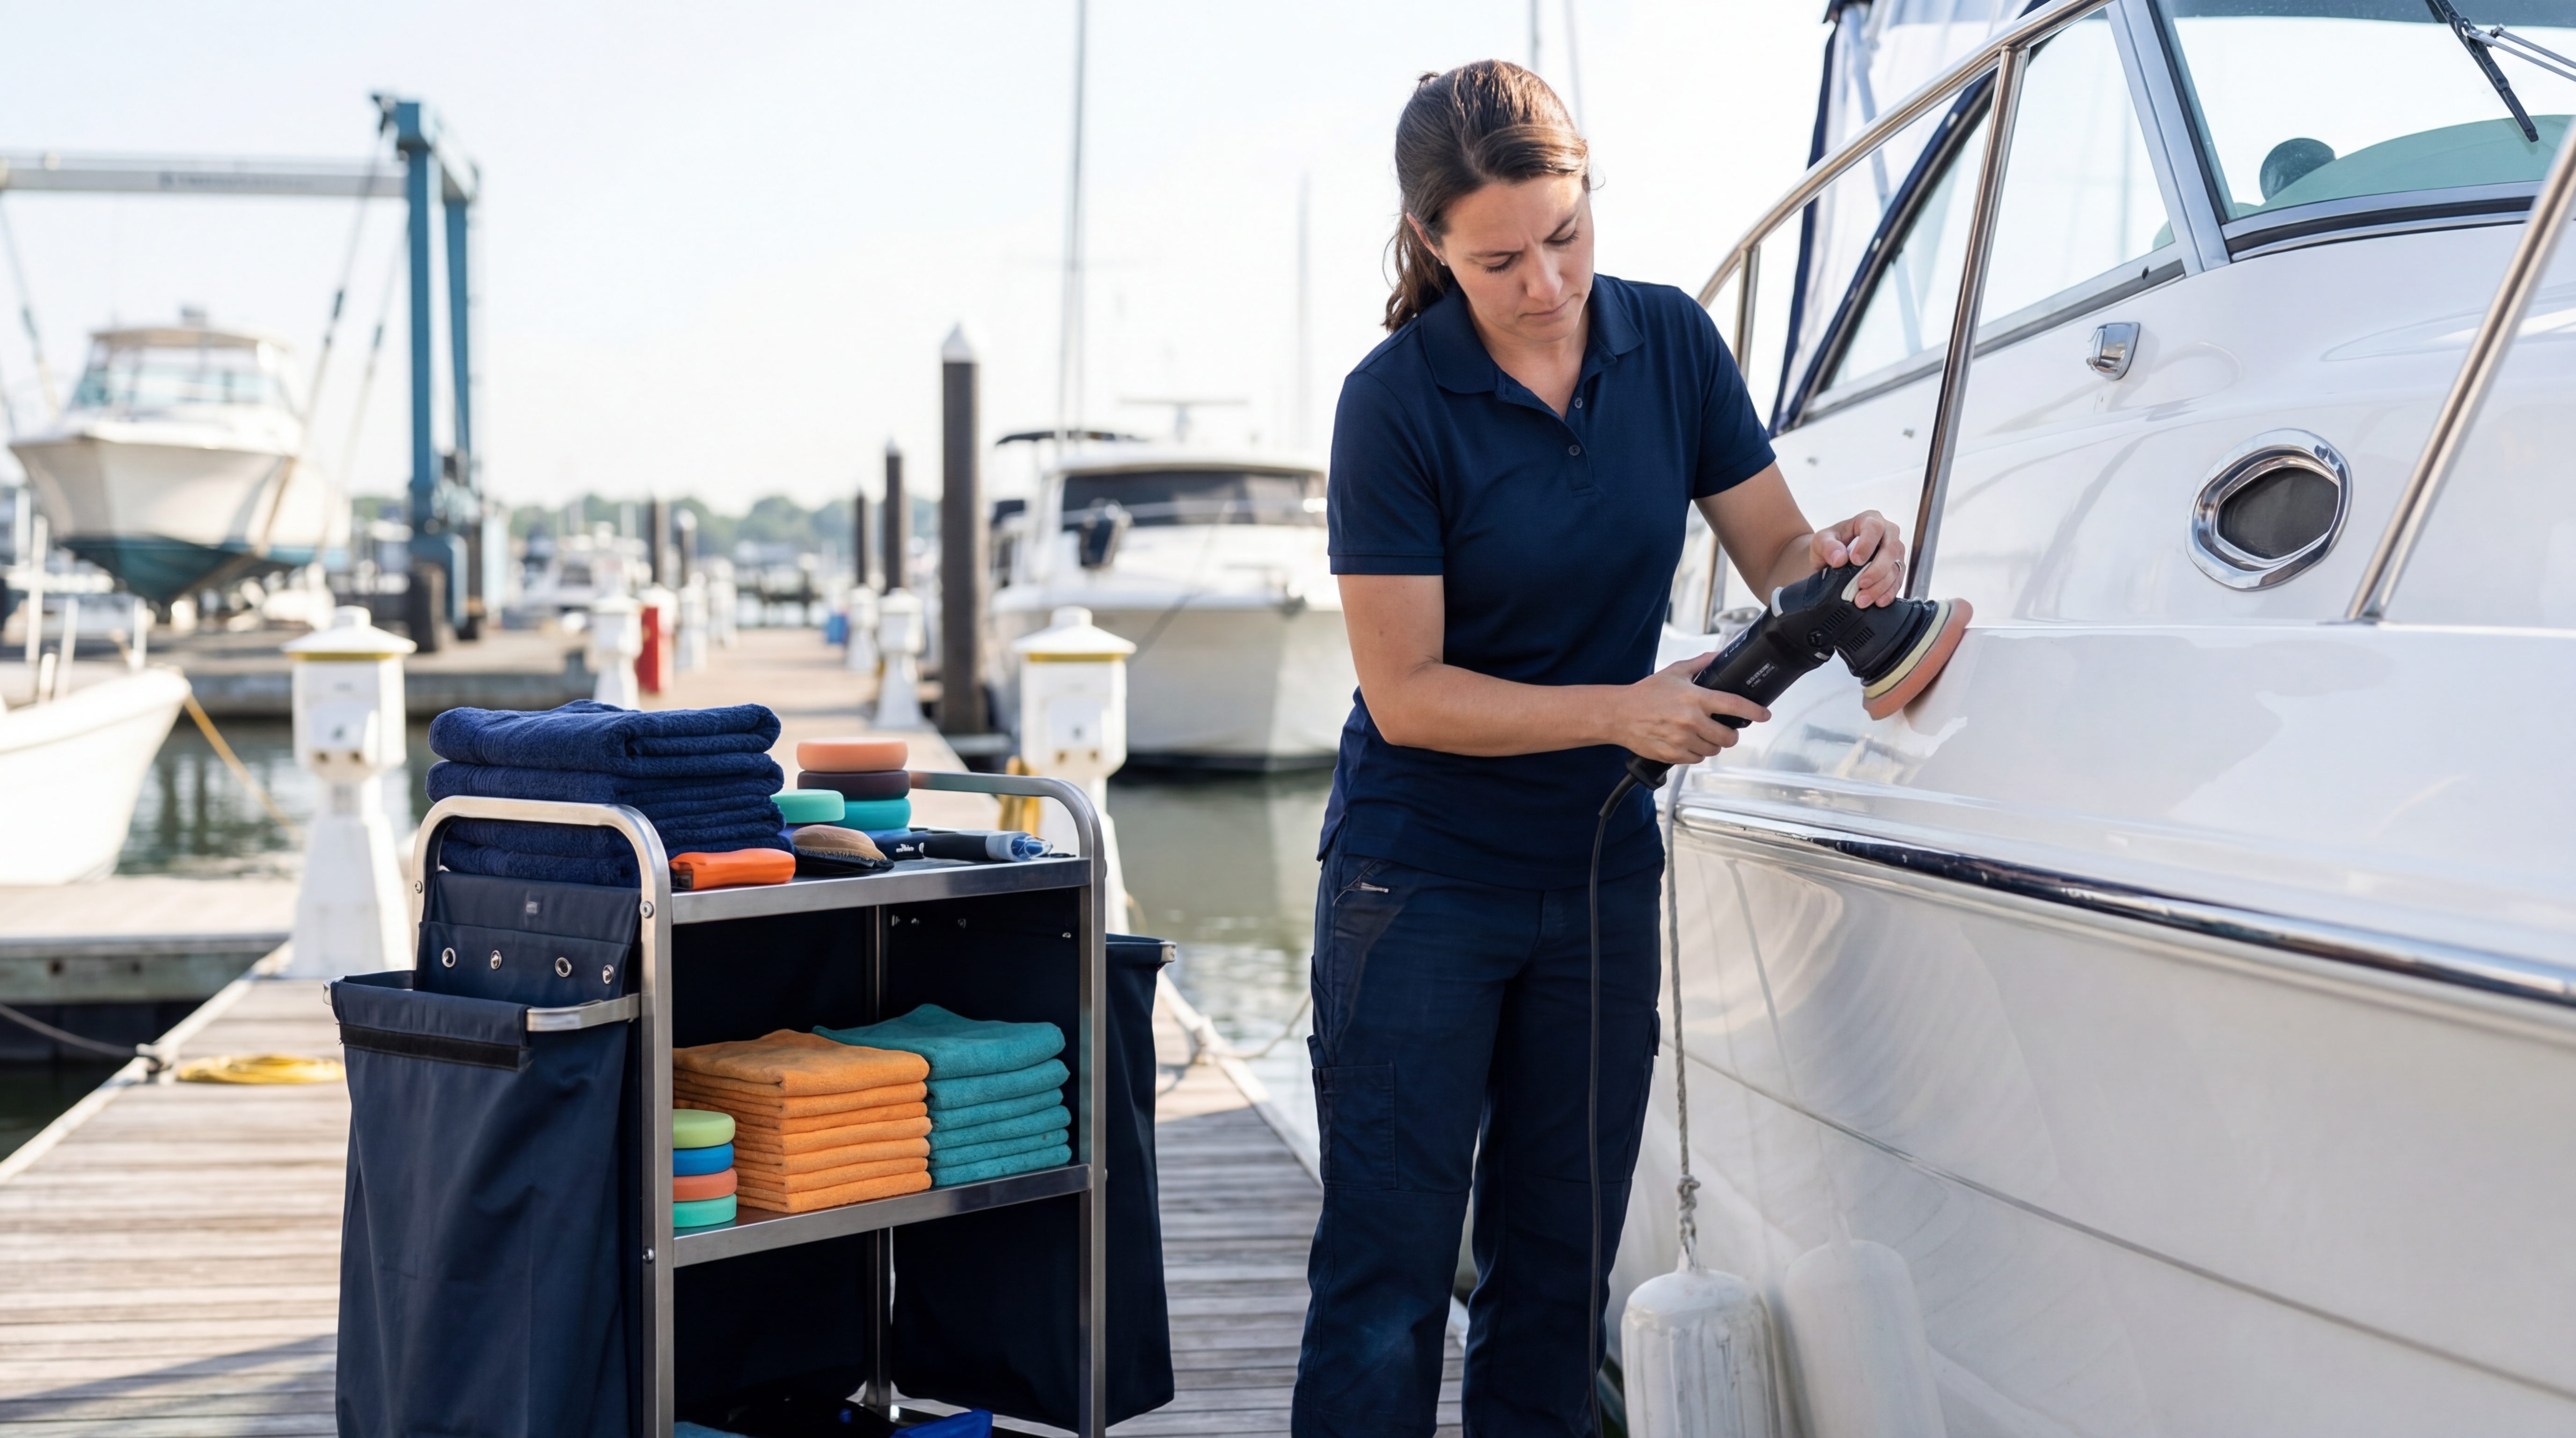
How Should You Protect Vinyl After Mildew Cleaning?
Clean vinyl without protection is an invitation for the next round of mildew and UV damage. Once your seats are clean and dry, apply two products.
UV Protectant
Marine vinyl UV protectant restores the protective barrier on the vinyl surface. It blocks UV radiation that breaks down plasticizers and prevents the vinyl from drying out and cracking. Apply with a clean microfiber applicator pad in thin, even coats. Buff off any excess after 10-15 minutes.
I apply UV protectant to every boat I detail, every time. It's the single most effective thing you can do to extend vinyl life. In my experience, a treated seat lasts significantly longer, often twice as long or more, than an unprotected one exposed to the same conditions.
Vinyl Conditioner
Think of conditioner as moisturizer for your seats. It replenishes plasticizer compounds at the surface level and keeps the vinyl from feeling dry or stiff. Apply after the UV protectant has buffed out. One coat is sufficient. Overconditioned vinyl feels greasy and attracts dirt.
After mildew removal, marine vinyl requires two protective treatments applied in sequence. A UV protectant creates a barrier against ultraviolet radiation, which breaks down the plasticizers responsible for vinyl flexibility. Applied every four to six weeks during boating season, UV protectant can extend seat life from an average of three to four years of unprotected use to eight to ten years, even in high-UV environments like South Florida or the Gulf Coast. Following the UV protectant, a vinyl conditioner replenishes surface-level plasticizer compounds that cleaning removes, restoring suppleness and preventing the dry, stiff texture that precedes cracking. A single thin coat of conditioner is sufficient; over-application creates a greasy surface that collects dust and organic debris, feeding future mildew colonies.
What Prevention Strategies Work for Next Winter?
The best mildew job is the one you never have to do. Here's what I tell every client at fall haul-out.
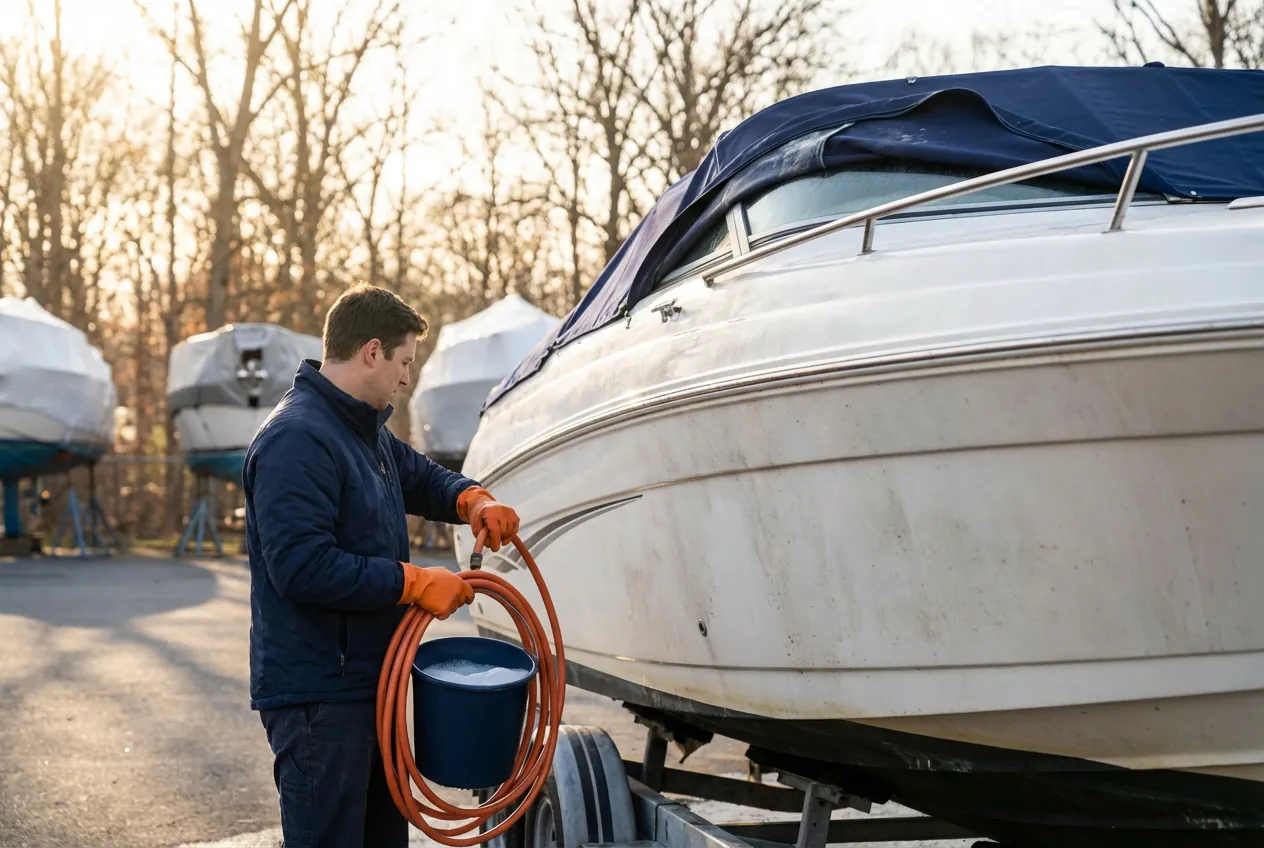
Clean Before You Cover
Every surface that goes into winter storage should be clean. Wash all vinyl with Boat Wash Pro. Remove all organic residue. Wipe down compartment interiors. A clean boat gives mildew nothing to eat.
Ventilation Is Non-Negotiable
If your boat cover doesn't have ventilation panels or support poles that create air gaps, add them. Shrink-wrapped boats should have ventilation ports cut in. Without airflow, condensation has nowhere to go and you'll open the boat to mildew in spring no matter how clean it was going in.
For detailed prevention methods, our mildew prevention guide covers ventilation setups and moisture management in depth.
Use Moisture Absorbers
Desiccant-based moisture absorbers (calcium chloride or silica gel products) placed in enclosed compartments and cabin spaces pull water vapor from the air. Replace or recharge them according to the manufacturer's schedule. In my experience, the refillable silica gel canisters outperform the disposable hanging bags because they absorb more moisture per unit and you can dry them out in an oven and reuse them.
Prop Cushions Up
Don't leave seat cushions flat against fiberglass bases during storage. Stand them on edge or prop them up with blocks so air circulates around all surfaces. This single step eliminates the moisture trap between cushion and seat base that causes the worst mildew.
Check Monthly During Storage
If your boat is accessible during winter, open it once a month. Check moisture absorbers. Look for early mildew signs. Air it out for an hour. A 30-minute monthly visit can prevent hundreds of dollars in spring cleaning costs.
When Should You Replace Instead of Restore?
Not every seat can be saved, and I'm honest with my clients about that line. Here's how I make the call, and a rough cost comparison.
| Factor | Restore | Replace |
|---|---|---|
| Vinyl condition | Flexible, no cracking | Stiff, cracked, peeling |
| Foam condition | Firm, no odor after drying | Soggy, persistent musty smell |
| Staining after 3 treatments | Faded or gone | Still prominent |
| Estimated cost (per seat) | $50-$150 for professional detailing | $300-$800+ for reupholstery |
| Timeframe | Same day to 2-3 days | 2-6 weeks (upholstery shop lead time) |
My general rule: if the vinyl is still pliable and the foam is sound, restoration is worth attempting first. You'll spend 20-30% of replacement cost and the seats will look 85-95% of new. For a boat with eight seats, that's the difference between a $600 detailing job and a $4,000+ reupholstery bill.
If the vinyl has hardened, shows cracking, or the foam is compromised, don't throw money at cleaning. Put that budget toward new upholstery and start fresh with a proper prevention plan.
I had a client last spring with a 2019 bay boat that had spent two winters under a non-ventilated cover. Every seat had deep mildew staining. We restored six of the eight seats with three rounds of treatment. The remaining two had foam damage and went to the upholsterer. Total cost: around $900 for detailing plus $1,200 for two new cushions. Full reupholstery quote for all eight? $5,400. That math speaks for itself.
Frequently Asked Questions
Can I use household bleach to clean mildew off boat seats?
No. Household bleach contains sodium hypochlorite, which degrades the plasticizers in marine vinyl through chemical oxidation. This causes the vinyl to harden, become brittle, and crack. Even diluted bleach causes cumulative damage with each application. Use a pH-balanced marine vinyl cleaner like Vinyl Bright that removes mildew without attacking the vinyl's chemical structure.
How long does it take to remove mildew from boat upholstery?
Surface mildew on a typical center console with six to eight seat sections takes 2-4 hours to clean properly, including drying time. Deep staining that has penetrated the vinyl grain may require multiple treatment sessions spaced over two to three days. Factor in time for under-cushion cleaning and compartment treatment, and a full mildew detail on a heavily affected boat runs 6-8 hours total.
Why does my boat get mildew even with a cover?
Covers trap moisture unless they incorporate ventilation. Daily temperature changes cause condensation inside the covered space, and without airflow, that moisture saturates soft surfaces. The dark, humid, still-air environment under a standard boat cover is ideal for mildew colonization. Adding ventilation panels, support poles for air gaps, and moisture absorbers addresses the root causes.
Should I replace or restore mildew-damaged boat seats?
Start with restoration if the vinyl is still flexible and the foam underneath is firm with no persistent musty odor. Professional mildew removal runs $50-$150 per seat, while reupholstery costs $300-$800+ per seat. If the vinyl is cracked, stiff, or the foam is waterlogged, replacement is the better investment. Three cleaning attempts without significant improvement is my threshold for recommending reupholstery to clients.
Is mildew on boat seats dangerous?
Mildew spores are respiratory irritants that can trigger allergic reactions, asthma symptoms, and eye irritation in sensitive individuals. Wear a dust mask or N95 respirator when dry-brushing mildew from boat seats, and always work in a well-ventilated area. The CDC recommends limiting exposure to mold and mildew, especially for people with existing respiratory conditions or compromised immune systems.
Can you use Magic Eraser on marine vinyl?
No. Magic Erasers are melamine foam pads that work as micro-abrasives, physically sanding away the UV-protective topcoat on marine vinyl. This makes the surface porous, duller, and more susceptible to future mildew colonization, UV damage, and deep staining. Use a pH-balanced marine vinyl cleaner like Vinyl Bright instead.
How do I prevent mold from coming back on boat seats?
Clean all vinyl thoroughly before winter storage to remove organic residue that feeds mildew. Ensure covers have ventilation panels or add support poles to create air gaps. Place moisture absorbers (calcium chloride or silica gel) in enclosed compartments. Prop cushions on edge so air circulates around all surfaces. If your boat is accessible during storage, check monthly and air it out.
Sarah Rodriguez has operated a marine detailing business in coastal Florida for fifteen years, specializing in restoration detailing for boats affected by UV damage, mildew, and oxidation. She details over 200 vessels annually.
Once your seats are clean, tackle the hull. Our spring gelcoat restoration guide covers oxidation removal, and the spring waxing guide walks through protection options.
About the Expert

Sarah Rodriguez
Marine Detailing Business Owner
Sarah runs a marine detailing business serving luxury yachts and charter fleets. Her reputation rides on every finish, so she only uses products and techniques she'd stake her name on.
“Your boat is my billboard. I don't do 'good enough.'”
Get Expert Tips
Subscribe for marine care insights and product updates from industry professionals.
No spam. Unsubscribe anytime.
You May Also Like

Spring Boat Waxing Guide: Protect Your Hull Before Launch Season
A professional detailer's step-by-step guide to spring boat waxing, covering surface prep, application technique, coat strategy, and when to upgrade to sealant or ceramic protection.
The Professional's Spring Boat Detailing Workflow: An 8-Phase System
A professional marine detailer breaks down her exact 8-phase spring detailing workflow, from decontamination wash through final inspection, with time estimates and product recommendations.
How to Clean Your Boat After Winter Storage
A marina manager's step-by-step guide to cleaning your boat after winter storage, covering exterior wash, interior mildew removal, and the mistakes that cause real damage every spring.